It’s about 5 years that I’m using Neovim as my daily text editor especially when it comes to software development. On the other hand, I do lots of Python programming during the last 4 years and so to develop more comfortably, I had to configure my text editor as well. In this post, I’m going to explain my daily setup for Python software development.
There are a few tools I use besides Neovim that help me a lot during my everyday development.
Terminal Emulator
Since I’m developing on macOS these days, my primary terminal of choice is iTerm2. I had also tried the macOS built-in terminal but I found that iTerm2 has better integration with Tmux so that I moved to it.
Shell
In term of shell, I moved to zsh (mainly through oh-my-zsh) about 5 years ago because I found it much better in compare to bash. OMZ community offer lots of useful plugins to choose from; but, for me these are my favorites:
plugins=(
    git
    docker
    docker-compose
    kubectl
    colored-man-pages
    git-flow
)
Tmux
Tmux plays a very important role in my daily development environment. I was using the neovim built-in terminal however I realized that nothing replaces Tmux. I usually split my main development window into two horizontal panes. The pane in the above for Neovim and the second pane which is located below that is for running tests and Git operations. I sometimes use the vim-fugitive plugin but in some cases, I believe it’s move convenient to use git in another window.
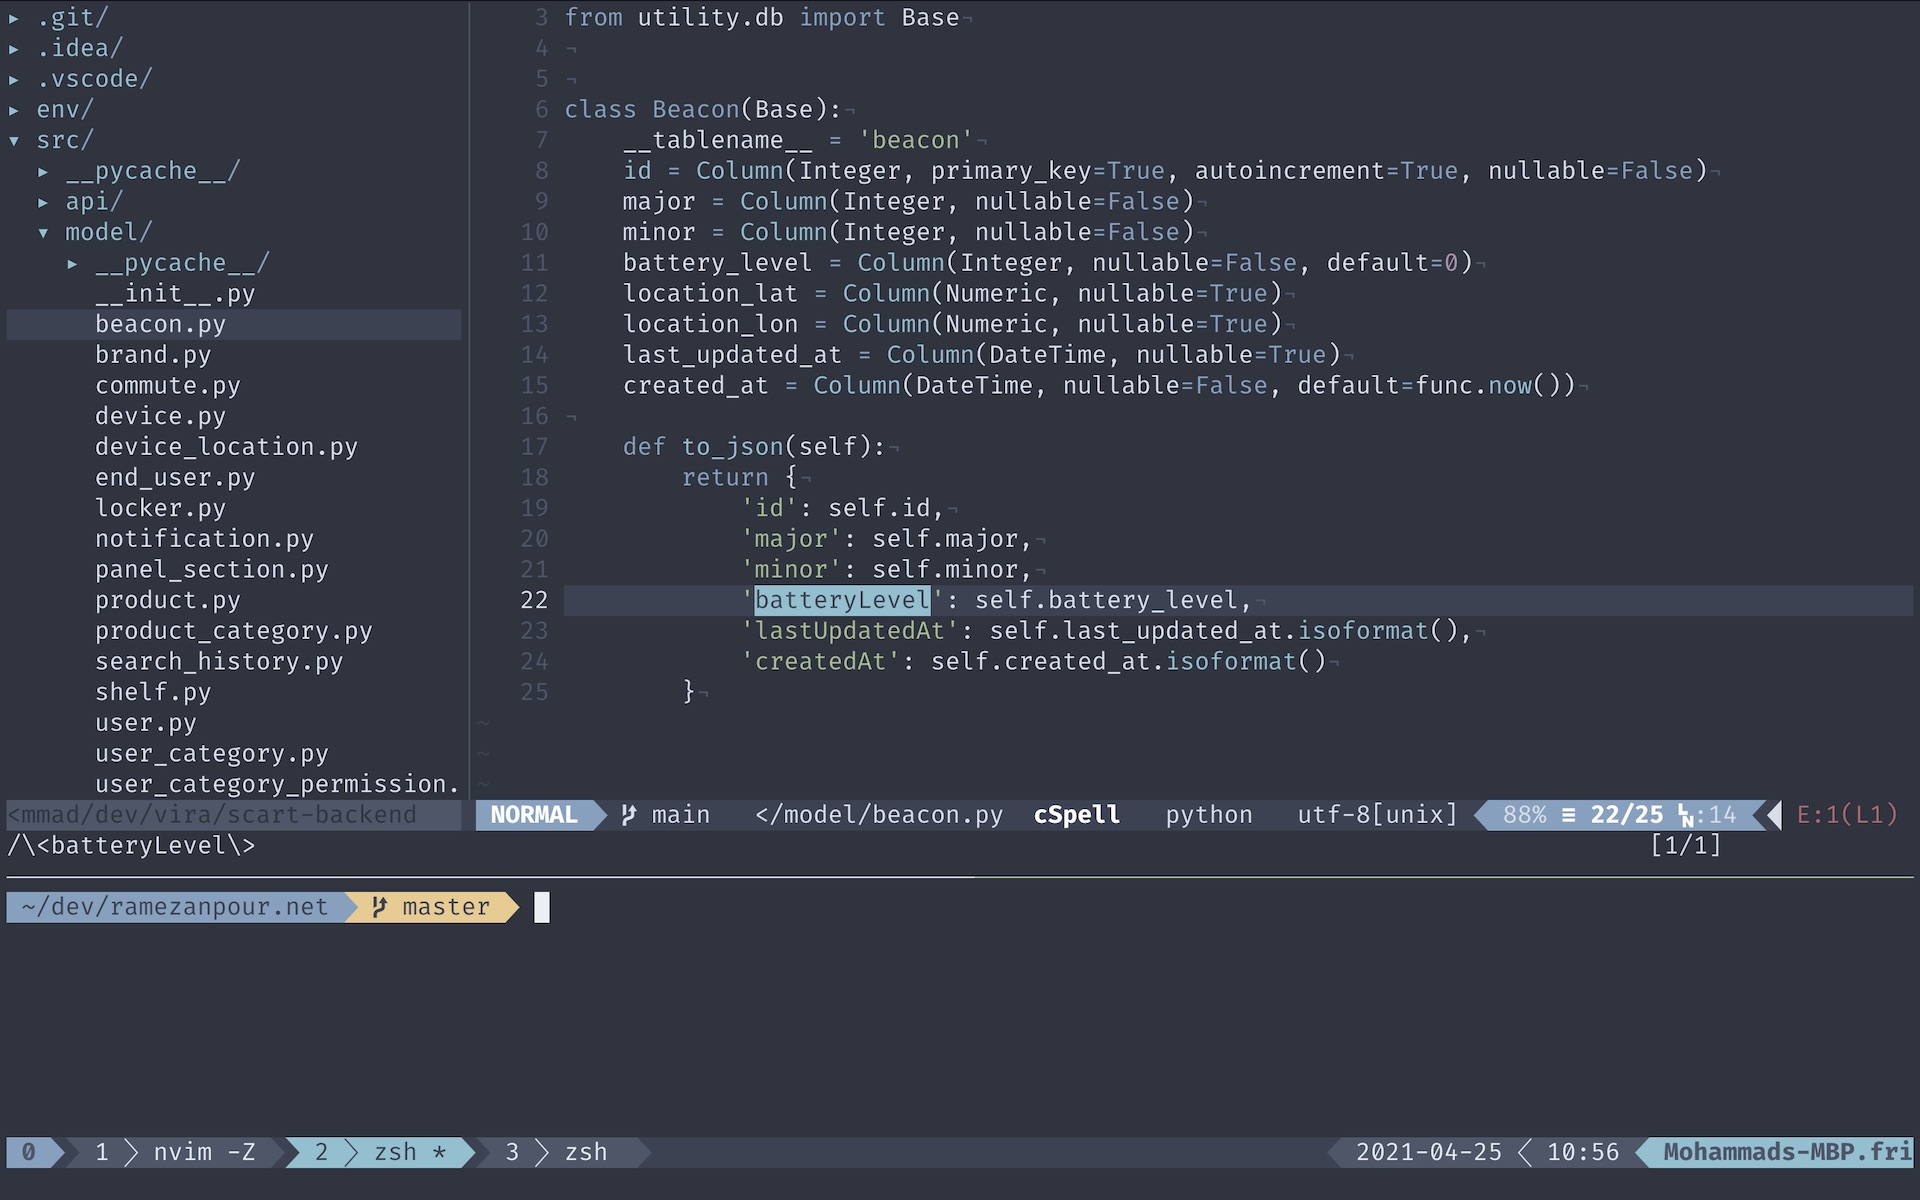
Neovim
If you’re a vim user, you are probably familiar with plugin managers. Vundle, Pathogen and Plugged are the three most popular ones. I was using Vundle for a long time, but recently I have moved to Plugged because I find it more customization about more easy to use. The plugins I use these days are:
" A fuzzy file finder
Plug 'kien/ctrlp.vim'
" Comment/Uncomment tool
Plug 'scrooloose/nerdcommenter'
" Switch to the begining and the end of a block by pressing %
Plug 'tmhedberg/matchit'
" A Tree-like side bar for better navigation
Plug 'scrooloose/nerdtree'
" A cool status bar
Plug 'vim-airline/vim-airline'
" Airline themes
Plug 'vim-airline/vim-airline-themes'
" Nord
Plug 'arcticicestudio/nord-vim'
" Better syntax-highlighting for filetypes in vim
Plug 'sheerun/vim-polyglot'
" Intellisense engine
Plug 'neoclide/coc.nvim', {'branch': 'release'}
" Git integration
Plug 'tpope/vim-fugitive'
" Auto-close braces and scopes
Plug 'jiangmiao/auto-pairs'
For python development, I was previously using jedi-vim alongside YouCompleteMe but after the presentation of Coc I completely hooked! Coc is a Nodejs extension host for Neovim which allows you to install npm based plugins (which is currently used in other text-editors such as VSCode) easily.
After installing Coc, I was able to install all the plugins I want to for my development environment very easily and just by using the CocInstall <package-name> command. Here is a list of all plugins I use:
coc-spell-checker: The general spell checker for neovimcoc-prettier: A very popular code formattercoc-git: A git plugin to show which line is added/deleted and not committedcoc-pyright: The main Python plugin I usecoc-json: JSON file formatting plugincoc-docker: Dockerfile and docker-compose formatterscoc-yaml: Yaml plugin for Kubernetes and terraform files
After installing your desired plugins it’s also a good idea to do a CocUpdate once in a while to keep your plugins up-to-date.
Then I set the following the shortcuts for the Coc for more ease of use:
" Code action on <leader>a
vmap <leader>a <Plug>(coc-codeaction-selected)<CR>
nmap <leader>a <Plug>(coc-codeaction-selected)<CR>

" Format action on <leader>f
vmap <leader>f  <Plug>(coc-format-selected)
nmap <leader>f  <Plug>(coc-format-selected)
" Goto definition
nmap <silent> gd <Plug>(coc-definition)
" Open definition in a split window
nmap <silent> gv :vsp<CR><Plug>(coc-definition)<C-W>L
Like VSCode, Coc also has a setting JSON file. For example, to formatOnSave or set a code formatter and linter, you can use that file. To open the setting file CocConfig command can be used. These are settings I use for Python development:
{
  "coc.preferences.formatOnSaveFiletypes": ["py", "yaml", "json"],
  "python.linting.flake8Enabled": true,
  "python.formatting.provider": "black"
}
Please also note that black and flake8 are external tools and need to be installed separately:
python3 -m pip install black flake8
There some other shortcuts which can be set to make your life easier as well. For example, I have set one to trigger NerdTree and showing hidden files:
map <C-n> :NERDTreeToggle<CR>
let NERDTreeShowHidden=1 " Show hidden files in NerdTree buffer.
Or for better split-view navigation:
" Split windows
map <C-j> <C-W>j
map <C-k> <C-W>k
map <C-h> <C-W>h
map <C-l> <C-W>l
Nord
Last but not least I use Nord theme almost everywhere. Nord has ports for almost everything. For example, for neovim you may add the following plugin:
Plug 'arcticicestudio/nord-vim'
And then add:
filetype plugin indent on
syntax on
colorscheme nord
I hope this post helped you setup your CLI based development environment as well :)

 There are some certain events that change people’s lives and all of us may experience one or some of them. For example, when one gets married, or when one becomes a parent. These events cause radical changes. You cannot be the same person after you become a father or mother. On the other hand, people want to grow. They take risks to become a better person. For example, one may take risk and start a new business. The business may fail, but at the same time it may make you grow!
 General Data Protection Regulation (GDPR) is the EU regulation to protect user data and privacy in Europe. A friend from Europe contacted a few days ago and told me that you don’t have cookie notice in your website and asked to do something about it.