
How to solve Wayland issues with HiDPI and multiple monitors
Since I joined my current company, I had been using a 2020 Macbook Pro. To be honest, I was totally satisfied with that laptop as it was super stable. But the main reason I chose a Mac rather than Linux when I joined was because of the fact that at the time I joined the company, they were offering Dell Latidudes for Linux which are (in my opinion) not the best choices. Recently, the company announced that in addition to Dell laptops they have started to offer ThinkPad laptops for Linux users as well! So, without thinking further I requested it :)
Diffrent scale for each monitor
After receiving the new laptop, it took me a few days to configure it the way I want. At first, I had some issues with multiple monitor configurations and settings. The problem was I couldn’t set different scale factors for each monitor separately. When trying to do so, it was applying the last configuration to all of my monitors instead of keeping each configuration separated. I researched a lot about it and and realized that I had to activate the “Fractional Scaling” to be able to have separated configs for each monitor even if I didn’t want to use the actual fractional scaling feature.
So, if you want to set different scaling percentage for each monitors, you need to activate “Fractional Scaling” just like the following:
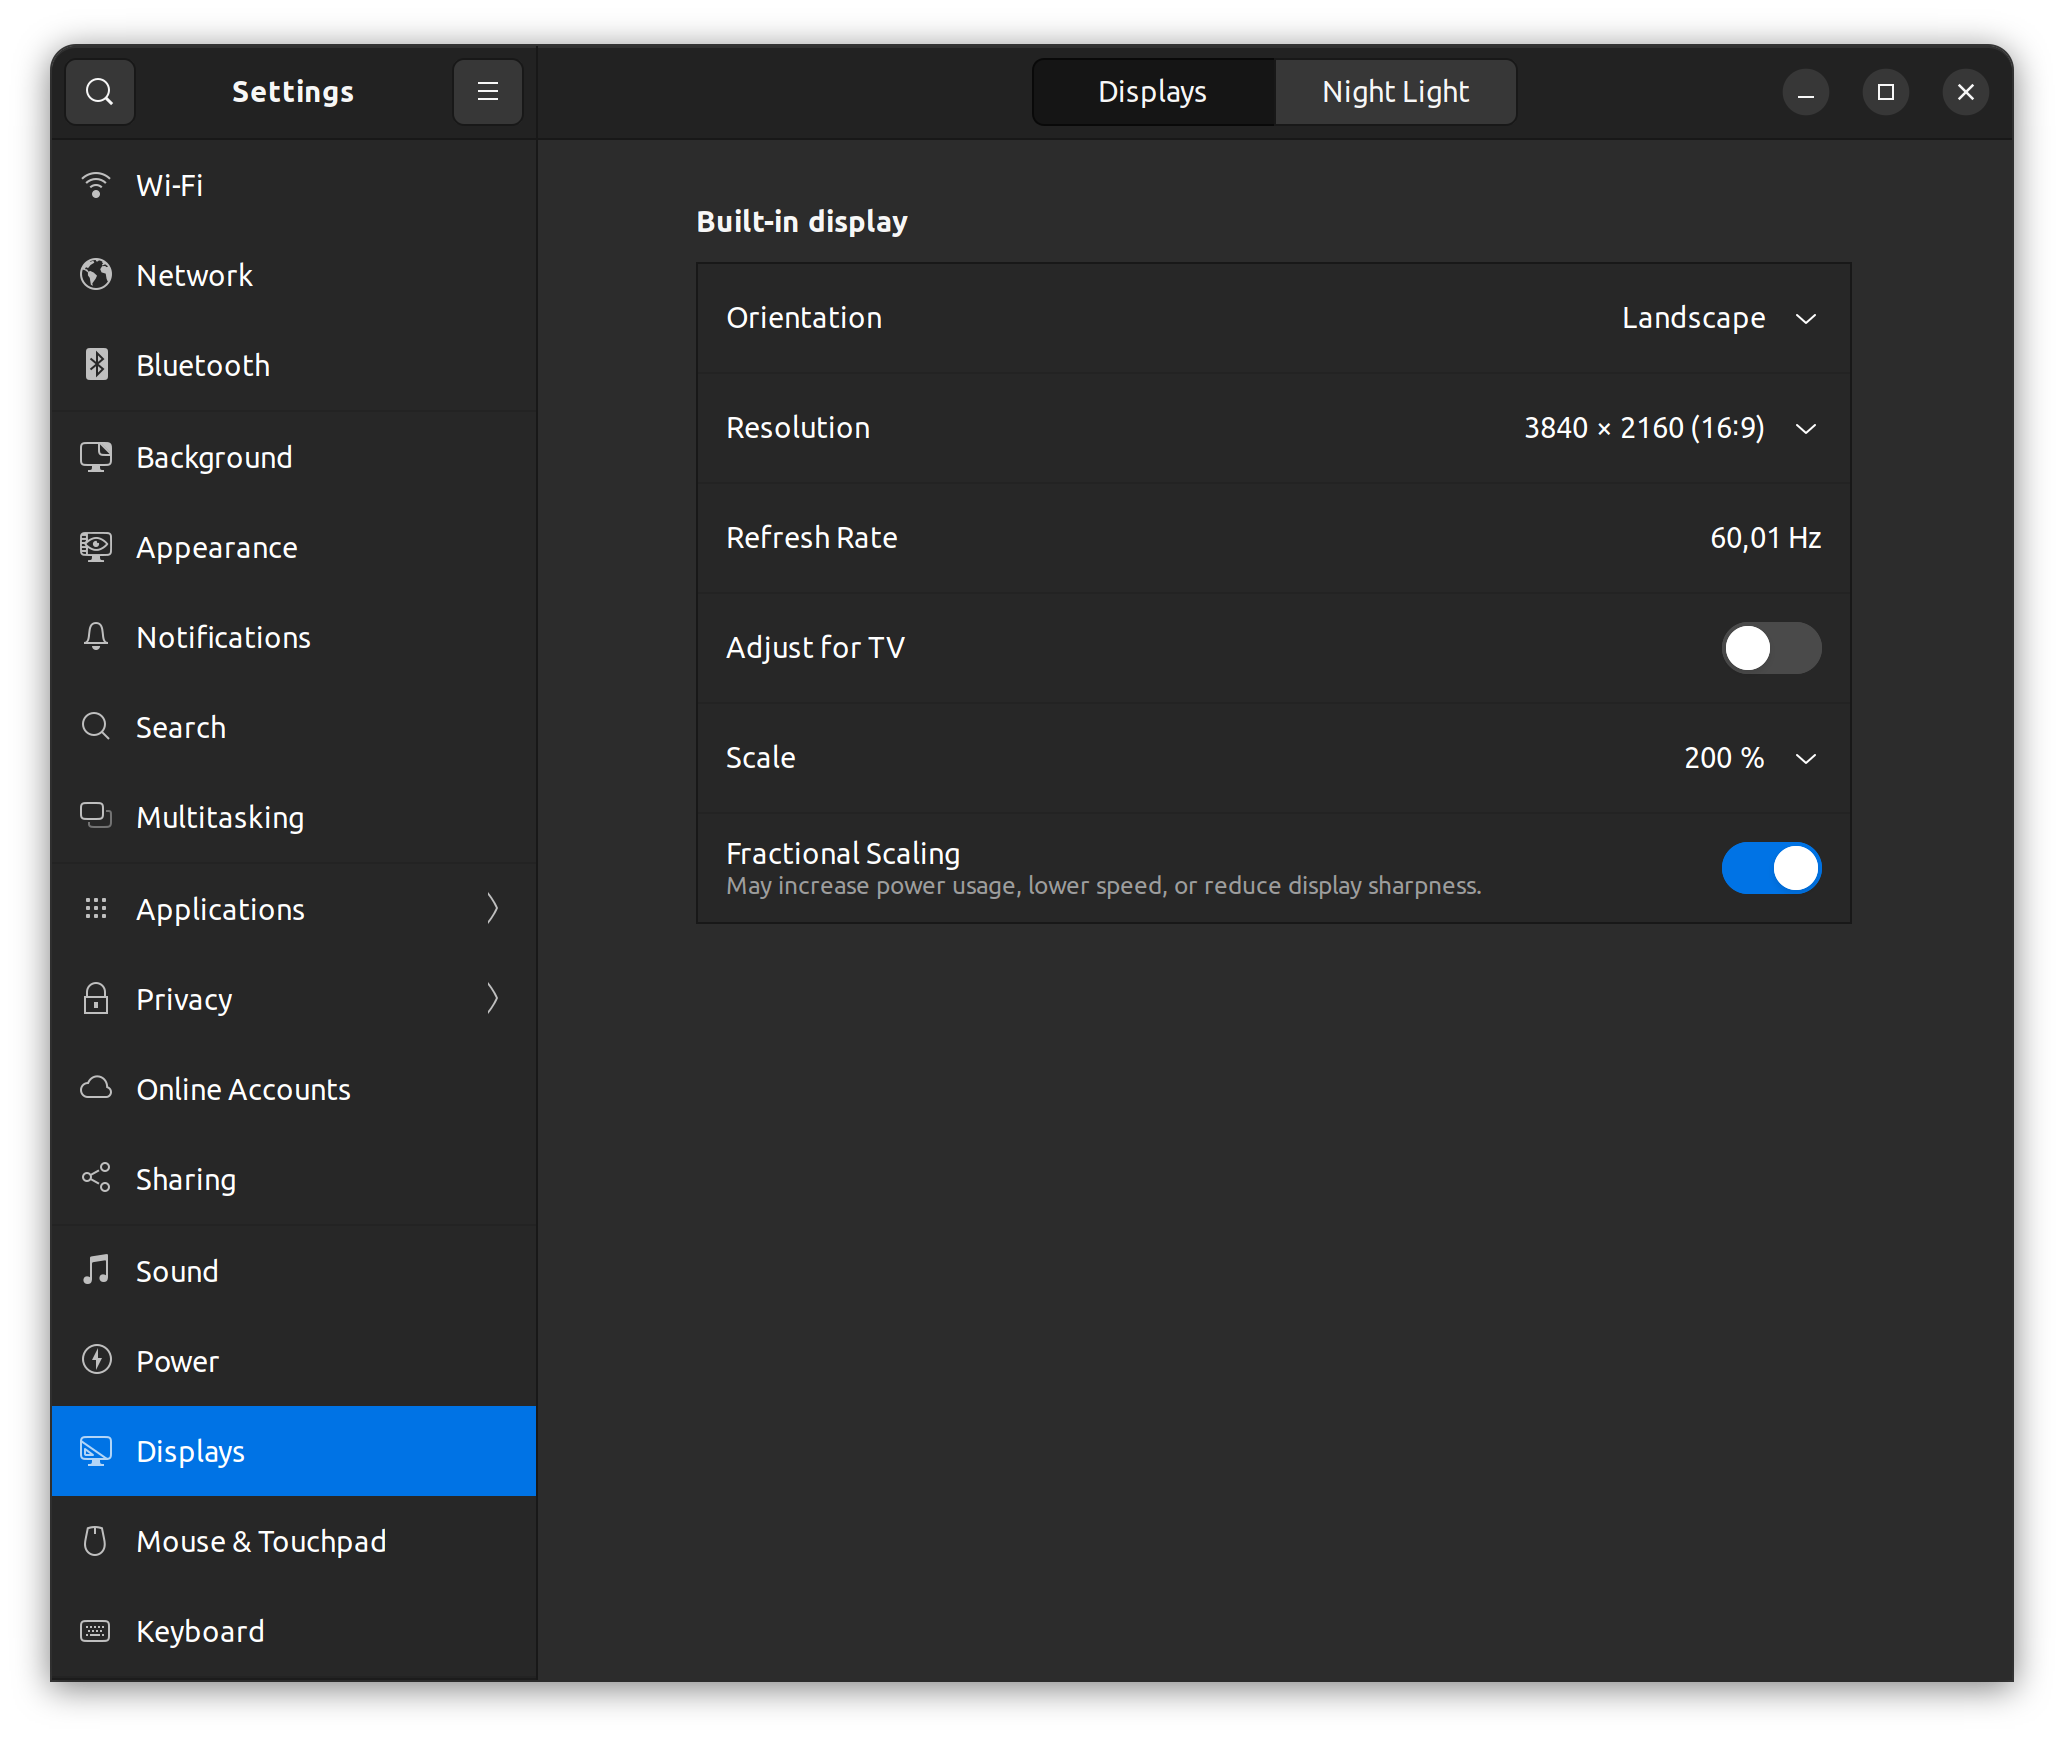
I know the provided solution is not relevant at all, but it was how it worked for me and I hope it works for you too.
Blurry texts in some apps
Another problem I faced was after changing the default scaling some apps’ texts became blurry. This is mainly because of the fact the some apps are not natively support Wayland. To Solve this problem you may need to two arguments when executing the app. These two arguments are --enable-features=UseOzonePlatform and --ozone-platform=wayland. For instance, here’s an example for Google Chrome:
google-chrome --enable-features=UseOzonePlatform --ozone-platform=wayland
You may say OK but I usually open Google Chrome from the menu not the terminal. Then, how can I add these arguments to the to the applications’ shortcuts? To include the arguments when running applications from the side menu or any menu in your Linux distro, you should add them to the applications’ .desktop files. Depending on the Linux distro you are using, the path to the files may vary. In Ubuntu, desktop files are located under /usr/share/applications. For example, to update Google Chrome shortcut, you should open /usr/share/applications/google-chrome.desktop (You may need to open the file with sudo since the user is root). After opening, search for the term Exec and add the above arguments like the following:
Exec=/usr/bin/google-chrome-stable --enable-features=UseOzonePlatform --ozone-platform=wayland %U
The only issue with this method is that every time apps are updated, they usually update their shortcuts as part of the installation process; so, you may need to do the steps mentioned above every time you update the apps.
Conclusion
Although more and more user are using Linux as their preferred desktop operating system, the application support is still limited in my opinion. You cannot expect everything to work as you expect from macOS and as a result, you should prepare yourself for a little bit of uncomfortably when want to switch to Linux OS especially for work. Also, all of the issues I have mentioned above are in place if you decide to choose “Wayland”. There’s also an option which you can use the legacy “X11” and according to my knowledge you won’t face any of the mentioned issues.


